printing at Graphic Arts Workshop


i’m now a full member at Graphic Arts Workshop! i get my keys on Sunday!!

Graphic Arts Workshop is a cooperative with approximately 40 members working in fine art printmaking. like City Arts  GAW is a non-profit, with no paid staff. we share and maintain the fully-equipped printmaking studio. they have several printing presses and tons of equipment.

i’ve met a few of the members so far. here’s Vanessa:

and Pete:

this is currently my favorite press. i love the pirate ship wheel.

printing press

my favorite printing press

lately i’ve been working on a couple of plates that have a photo image of some hooks hanging on a chain link fence. i made two plates out of the same image in class at Kala. Kazuko Watanabe taught me two methods of photoetching. in one we exposed a pate that had a photosensitive polymer to a positive of my image, the polymer reacted and hardened where it was exposed to light. after it’s washed and hardened the polymer has ridges and valleys like a copper plate. the second method she taught used a photosensitve ground which reacts to the light and later when you put it in the acid only the dark areas will be etched to create ridges and valleys etched into the copper like a normal copper plate.

in class at Crown Point Press i applied a soap ground to the copper plate and etched the plate some more. on my own at GAW i applied a surgar lift to the copper plate and etched it  yet again:

my copper plate with a sugar lift applied

my copper plate with a sugar lift applied

what you may be able to see in this shot is the lighter parts of the copper plate that have been etched, the darker copper which prints white (it’s the background) and the dark and shiny sugar solution on the plate. when this is dry i will coat the plate with a ground that resists the acid right over the sugar. when that dries i wash the plate in warm water and all the sugar will lift up, breaking through the ground creating unprotected areas where the acid can bite the copper.

this is the plate coated and drying:

copperplate drying

copperplate drying

this is my acid set up.

acid bath

acid bath

i love this shot! it shows the 2 trays, one with acid and the other with water. it also shows all the acid stored under the counter, the big huge exhaust fan, and some cool random coloring on the back of the table.

after the plate is etched, i clean it up and it;s time to ink it. i love the huge hotplate at GAW which is set up nice and high to make inking and wiping the plate a joy!

inking station

inking station with high hotplate at GAW

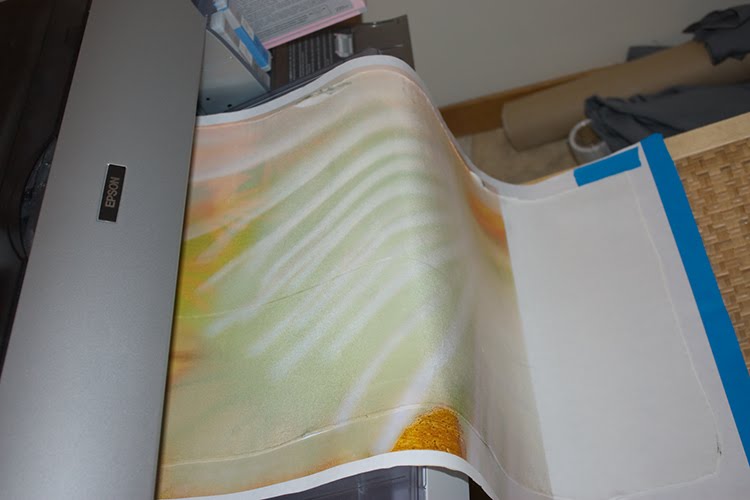
i have to set up the press, which includes getting the pressure of the rollers just right. thank goodness the press at GAW has a gauge with numbers so you can make both sites the same and keep track of what works best for a plate and paper combination.

second printing with polymer plate

second printing with polymer plate

in this picture the image is on the white paper which is pulled up against the blanket which has been pulled up over the roller. you can see the black and white impression from the copper plate that i’ve already pressed. i left the paper trapped under the roller to hold it steady while o switch plates. i have a template on the bed of the press so i could put the second plate in the same place. the plate that’s there now is the polymer plate. i’ve inked it yellow so i can see how the two plates interact.

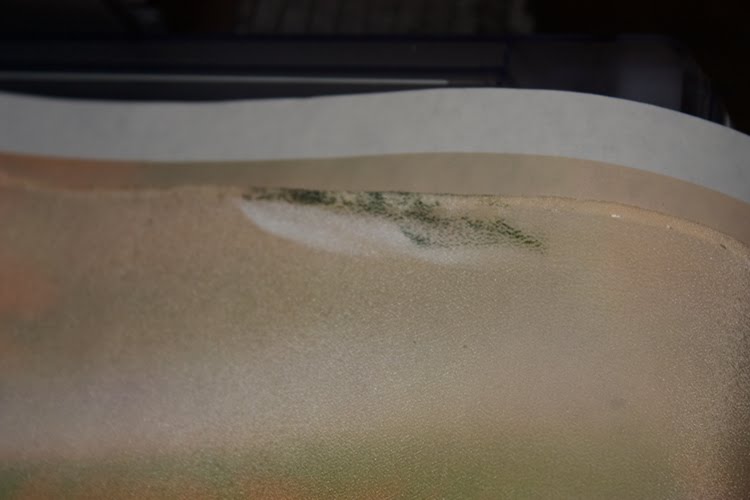
finally i wanted to transfer the ink onto the copper plate so i could decided what i wanted to do the the copperplate next.

transfering ink back to copperplate

transfering ink back to copperplate

this is where we dry the prints in this enormous rack!

drying rack

drying rack at GAW


so i’m a happy artist at GAW!

my set up for printing on silk


Here’s a photo of the way i set up my work table:

it shows how i put down some cardboard cuz the table is rough and then i layer graph paper so i can have straight lines for reference. the first thing to do is to wash the silk. i purchased some professional but environmentally friendly soap from Dharma Trading when i purchased the silk. then it really should be fully pressed before you begin attaching it to the backing (i skipped this and paid in the end!). You should do this on a hard surface which can handle the heat.

here’s a photo of my favorite papers to do this with:

The parchment paper is to use on top so your iron doesn’t mess up the silk and the freezer paper doesn’t mess up your iron. You can use what you like for this, but be warned that regular wax paper will melt and ruin your silk. i like so see thru to the silk so i don’t use a cloth for this. The freezer paper is the star of the show for me. I know of no other brand or sizes available. around here only the Safeway seems to carry it.

in this next photo i’m using the closest thing i had to a “T” square to insure that i am laying out the freezer paper very straight.

if the paper is at all not perfectly straight the printer will go crazy.
In this next image i am using the wide masking taper to measure out the amount i have to cut off the width of the paper so that it will fit on my 17 inch printer. darn paper is 18 inches wide.

in this photo i’ve laid out the silk.

i wonder why i stopped to take this photo? i probably knew darn well i should have pressed this silk before i laid it down on the freezer paper. the day before i’d washed and pressed it and then folded it up in a hurry to do something else.

these next 2 shots show the whole sandwich. the shiny freezer paper, the silk scarf with it’s tiny hem, and the parchment paper on top. see how you can see through the parchment to the silk?

these show how you can even see the edge of the freezer paper through the parchment paper as you press the silk to the freezer paper. What’s going on here? the coating on the freezer paper is some kind of silicon or plastic. when i set the iron all the way up the coating gently melts and holds onto the silk.


You can also see the blue artists’ tape that i made meticulously straight and at right angle to the uncut edge of the freezer paper. this is what makes the whole thing work for me when i insert it into my printer. the edge is slightly heavier than to too light freezer paper and it lets the printer know exactly where the front edge is. the printer can become confused if it sense the edge of the paper and the edge of the silk.

Please note that i should have looked at my old notes at this point. the way my printer works in the banner setting is it creates an extra leading edge. it rolls the paper 7 3/4 of an inch too far before it starts printing. this is easy to fix when you anticipate it. simply use a larger piece of freezer paper than you need and back the silk up so that it starts 7 3/4 inch (or what ever distance your printer adds) from the front edge of your carrier paper.

Although everything looks smooth a beautiful in these close ups it is not! check out the bumps i left in it! DO NOT DO THIS.

Here is the chute i build with chairs and boards and things i found around the house. i laid an old piece of freezer paper down over the whole thing to make a nice smooth slide. The paper goes over the cover for the roll paper which has been removed and down into the roll paper feed.

and the printing has begun! you can see the lively colors, the 7 3/4 inch gap (arrggg) and the beginnings of trouble in the form of black smudges on the edges.

Here’s the printer hard at work. i watch for trouble through the smoky lid showing the print head laying down the ink.

the trouble did not get out of hand completely, where the silk lifts completely off the carrier paper, but here’s two close ups of how a small weakness grows:

printing on silk: reflections


quick notes on the printer set up, photos to follow.
w/ Epson 4880 & my mac I need to create custom banners to print huge. the IMAGE width must end in .34 (17.34 for a 17 inch wide print) if you want retain size not auto expand as I do. the custom paper size must add .1 for the length and .23 to the width. this will cause a warning about clipping to come up every time you print. just say ok.
up to the 52 in long scarves I was able to print borderless, w/ 0 margins all around in the custom paper and “borderless roll retain size” in the Epson printing dialogue box. but yesterday the printer refused to print borderless so I ended up adding a margin in the custom paper size and changing the paper source in the Epson printer dialogue box.
note that the printer itself kept defaulting to a cutting state, even tho I set no cut in the software. need to change the default setting on the printer for now cuz cutting in the wrong place would be a mess!
also, the current image can be about an inch narrower and i’ll get less spillover onto the paper.
need to attach scarf with 5 inch lead of paper because in the banner setting the printer pushes thru extra at the beginning.
I set the ink density to +20 which was clearly too hi. I had used a +10 setting on that silk on a roll I used last and that had been to low.
the image blurred a lot. it looks good but i’m wondering if I can get the detail back when I want it buy reducing the ink density or need I get the digital ground Heidi recommends?

– Posted using BlogPress from my iPad
kayla garelick, daydreaming artist
http://daydreamingarts.net
http://facebook.com/kayla.Garelick

Altered Barbie getting ready


Photo depicts “Barbie’s Hood Ornament” by Leigh Radtke.
Well the Altered Barbie show is coming closer. I’m running like mad to get organized. the press release went out, the post card is at the printers I actually had some input, but mostly i fixed the issues with the logos for the sponsors in the press release.
this is just the sort of thing i’m good at. problem solving on the fly.
the first acceptances went out. there are actually some artists who don’t have email and that makes it hard to contact them, snail mail is well, … slow! so i won’t publish all the names yet.
I actually made a spreadsheet – yeah i know!! this is tough for me of course with the dyslexia and all but i have to get some skills in this area. i need them for Frank Bette Center for the Arts too.

I went out and purchased the domain name for altered barbie and set it up with a real life server. there were lots of little bugs at first, several caused by my inexperience! but i worked it through with tech support.

So now i really have to update the Altered Barbie site and blog and our pnn.com interactive news site cuz so many details have firmed up. I also have to start adding artists pages and gather artists info for the book and website. Oh and the sponsers! (of which daydreaming arts is one!)

I love working on this show but i’ve been doing it pretty much non stop for two weeks now with just a short break to help with intake at Frank Bette last Sunday. Boy was that demanding!!! Also I did my shots but have yet to print them cuz my printer still hasn’t arrived (another crazy story) and i’ve been working hard on helping Sarah with her dioramas. getting Barbie to stand up is really hard!!! Oh and Sarah and i were at the mall yesterday and we started planning what we will wear to the Barbie Ball, it’s getting so exciting!!!!!
so i’m heading over to the blog right now.

spring at last or Seeing Grean


i’ve been so incredibly busy lately and the weather has been so fine, i haven’t sat still long enough to write a blog in quite some time! this flower petal isn’t even a spring flower! it’s from the dead of winter — which around here is not so dead!

the TV of Tomorrow show last week was FANTASTIC! what fun we had! mostly the techies kept to themselves and the artists kept together, even though we’d never met before. the show was a conference for folks who work in the development end of interactive tv. the idea was to explore the possibilities. in keeping with that theme our art all had something to say about tv and many of us imagined where it might go.

one piece was a robot that was peopled remotely. there was a tv screen with the person’s face broadcast live and you could talk to her and she’d talk back. the robot could move around the room because it was wireless. this was created collaboratively by some art students. it became the intersection for the artists and the techies. being so overtly techie as a piece it was easier for the techies to approach.

the was also a student journalist there so i had my first newspaper interview. i wonder if her published anything!

on Sunday i drove up to Petaluma to pick up my art from the Aurora Colors Gallery and had a nice chat with the owner. in the car i switched out frames cuz i hated that Plexiglas and took that piece and two others down to Ben Lomond for the “Seeing Green” show at the Santa Cruz Mountains art center http://www.mountainartcenter.org/

so i will have three rather green pieces there- the show opens friday night with a party and goes for a month. i still have work up at the Frank Bette Center in Alameda. for now it’s in their “Green” show and that will be follow by our Alameda on Camera work. all 40 photographer’s and our vision of the city!

i’m printing out – for the fourth time – the piece for that show as i write this. it has a great story behind it which i will share when i post the image here. i’m reprinting it to get the sharpening just right. it’s very textured and it looked to grainy, then too blurry, and then grainy again.

i ended up sharpening different parts of the image differently. over all used “High Pass”, for which you have to make a copy of your background layer because it is a destructive filter and when you are done you blend it with the original layer. I have some of my own tricks that i’ve added to this hidden gem. i like making the hi pass layer black and white to avoid adding a color cast and playing with the blending modes and opacity.

i made a separate layer for sections of the picture that had unique issues. one part for example, was so deeply orange / red that it was loosing detail when it printed. rather than desaturate (which i’ll try if this doesn’t work) i put this part on it’s own layer and sharpened it in such a way as to emphasize the hidden yellows. this created a more textured look and lessened the orange / red blow out.

it’s coming out of the printer now. well i won’t decide til tomorrow whether i need to keep working on this image. often the print changed a bit as it dries over night.

now i know how Jackson Pollock got his start!


now i know how Jackson Pollock got his start!
he discovered that the paint companies were ripping him off by making it seem like the paint cans were empty when in fact there were gallons of paint left inside. but the only way to get the paint out was to poke holes all over the cans and whack them, throwing paint every which way in his studio. some of it landed on a canvas and he kept it a secret cuz he figured punching holes in the paint can was probably a copyright violation for reverse engineering them!

similarly i now have Pollock-esque scarves having discovered that those “empty ink canisters from Epson don’t have a few drops left when they tell you it’s empty. there’s the whole Hetch Hetchy Reservoir in there!
i started out all controlled taking little drops of pigment out of the holes where the air locks are on the bottom. but soon they were leaking everywhere – especially that crazy cyan. soon enough i was feeling my anger boil and my sense of humor take over and i started whack the so called empty canister onto the silk scarf i was working on.
talk about abstract!

well it won’t sell but i will wear it proudly to proclaim that i did not reverse engineer it, i got what was rightfully mine!

in this drawing (from MOMA’s website – follow link in the title to this post) Pollack has discovered that the black and sepia ink containers have hidden reserves of ink the company never intended he be able to use. just pay for.
Jackson Pollock. (American 1912-1956) Untitled (1951) Black and sepia ink on mulberry paper Gift of Lee Krasner in memory of Jackson Pollock © 2006 Pollock-Krasner Foundation  Artists Rights Society (ARS) New York
Jackson Pollock. (American, 1912-1956). Untitled. (1951). Black and sepia ink on mulberry paper, 25 x 38 3/4″ (63.5 x 98.4 cm). Gift of Lee Krasner in memory of Jackson Pollock. © 2006 Pollock-Krasner Foundation / Artists Rights Society (ARS), New York

more on doll faces


well i couldn’t sleep this morning so i got up and finished stuffing all the little hands for the dolls in the book. and then i cut out the first of the faces. ironed the back off the blumenthal silk and sewed it to the tea dyed cotton back of the head.

My concern had been that i’d printed the faces too close together and wouldn’t be able to sew the face to the back for lack of a seam allowance. Well i had to sew close to the edge so i sewed over it 3 times. I know from stuffing the hands that if the seam allowance was too small, it would break right through when i stuffed it. and my machine has limited capabilities so the smallest stitch is not so small. It came out fine. it’s a smaller head overall than i’d pictured in my head, with no space between the end of the image and the start of the cotton for the back of the head. But it looks fine cuz it’s a grown up head. i think for the baby and little kid faces i will be sure to print with a seam allowance in mind so the head can be rounder and the face set off from the back.

doll faces


I’m making a fabric book that has little rag dolls in it. their fasces are photos printed out on the silk.

I’m using some the baby pictures i had scanned in. They are some old black and whites that i then made look as tho they were hand colored using Photoshop.

I remembered my previous efforts at actually hand painting a print and i knew i needed that undo button on the computer!

I used a painting layer. i then blended the layer using “color” or “soft light” blending mode for the layer. One got complicated around the eyes and i ended up having three layers, one with just the eyes repeating, blended with “soft light.”

of course i spent way too much time fixing up the old photos. I’m also using images of grown up shots that are mostly old IDs i scanned in. one was a NY driver’s license which puts a moiré pattern over your face. many of the lines for the face are lighter than the moire pattern cuz it was over exposed. But it’s the fading away that i liked about it, so i actually spent time erasing these lines so you could make out the face!

OCD and tiny threads!


Ok be truthful, all you who work with this silk you can print on — how much do you fuss with the little tiny threads and hair like fuzz on your silk????

This is definitely bringing out the OCD in me! ha ha ha ;-}

I’m getting gorgeous prints on the chine that i got from Colortextiles for my window.

i’m excited!
I ‘m simultaneously sewing the little hands for the dolls for the cloth book. I can sew and stuff an arm in about the time it takes to print out a panel for the window!

colortextiles and light


my Colortextiles samples came and i really like the crepe de chene “14” for the window project. it’s got the right amount of variation in the thread and seems to throw more light. I think I’ll use the blumenthal for cloth books cuz it seems stronger.
As i was falling asleep last night i saw one side of the window with silk and the other with a gel transfer.

humm… i wonder how that would really look.

I signed on to the fabric group at yahoo groups and i’m reading through old posts.

I’m going to move my studio into the living room and the living room into this room, which is the dining room. I will get alot of resistance but i’m in this house all day and they are here for a few hours everyday. Morey’s “study” (my son’s bedroom when he’s not in college) is bright and sunny (when there is sun in this fog belt) and it has access to the deck. my daughter’s room is twice the size of our bedroom and she pretty much has exclusive use of the family room, which is the same size.

The dining room where my studio is has no natural light. it’s window looks out to the front stoop which has a roof and a gate. the stoop has a sunroof but it doesn’t let much light through.

can you tell i’m shoring myself up?